Preparing for Butterfly Valve Replacement
Gathering Necessary Tools and Equipment
Before embarking on the butterfly valve replacement process, it's crucial to gather all the necessary tools and equipment. This preparation ensures a smooth and efficient replacement procedure. Start by collecting wrenches of various sizes, including adjustable and pipe wrenches. You'll also need screwdrivers, both flathead and Phillips, to handle different fasteners. A socket set with multiple sizes is essential for removing and installing bolts. Don't forget to include pliers, both needle-nose and channel-lock, for gripping and manipulating small parts.
Safety equipment is paramount, so make sure you have protective gloves, safety glasses, and a hard hat. For precise measurements, a caliper or micrometer may be necessary. If you're working with larger valves, consider having a lifting device or hoist available. Lastly, ensure you have appropriate gaskets and sealants on hand for reassembly. By having all these tools and equipment ready, you'll avoid unnecessary interruptions and streamline the replacement process.
Safety Precautions and System Shutdown
Safety should always be the top priority when replacing a butterfly valve. Begin by thoroughly reviewing the system's safety protocols and procedures. Ensure that all team members are aware of emergency shut-off locations and evacuation routes. Before starting the replacement, it's crucial to properly shut down the system. This involves closing all relevant valves and isolating the section where you'll be working. Depressurize the system completely to prevent any unexpected releases of fluid or gas.
Use lockout/tagout procedures to prevent accidental system activation during the replacement process. This involves locking out power sources and tagging them to indicate maintenance work is in progress. If you're working in a confined space, ensure proper ventilation and follow confined space entry procedures. Additionally, if the valve has been in contact with hazardous materials, take appropriate decontamination measures before beginning the replacement. By meticulously following these safety precautions, you create a secure environment for the valve replacement task.
Identifying the Correct Replacement Valve
Selecting the right replacement butterfly valve is crucial for ensuring optimal system performance. Start by carefully examining the existing valve and noting its specifications. Pay close attention to the valve size, pressure rating, and temperature range. The material of construction is also a critical factor, as it must be compatible with the media flowing through the system. Check the valve's end connections to ensure they match your piping system, whether it's flanged, wafer, or lug-style.
Consider the valve's actuation method – whether it's manual, pneumatic, or electric – and ensure the replacement valve is compatible with your control system. If your application has specific requirements, such as fire-safe or cryogenic service, make sure the new valve meets these standards. It's also wise to consider any potential system upgrades or changes in operating conditions that might affect valve selection. By carefully identifying and selecting the correct replacement valve, you set the foundation for a successful and long-lasting installation.
Step-by-Step Butterfly Valve Replacement Process
Removing the Old Valve
The process of removing the old butterfly valve requires careful attention to detail and proper technique. Begin by ensuring the system is completely shut down and depressurized. If there's any residual pressure, release it safely before proceeding. Next, disconnect any actuators or control devices attached to the valve. This may involve removing electrical connections, pneumatic lines, or mechanical linkages.
For flanged valves, start by loosening and removing the flange bolts. It's often helpful to leave a few bolts partially engaged to prevent the valve from falling unexpectedly. For wafer-style valves, you may need to spread the pipe flanges to create enough clearance for removal. Use caution when spreading the flanges to avoid damaging the pipe or adjacent components. As you remove the valve, be prepared for any remaining fluid in the line. Have a container ready to catch any spills and dispose of the fluid properly. Once the valve is free, carefully extract it from the pipeline, being mindful of its weight and any sharp edges.
Preparing the Pipeline for the New Valve
After removing the old valve, it's essential to properly prepare the pipeline for the new installation. Start by thoroughly cleaning the flange faces or pipe ends where the new valve will be installed. Use a wire brush or appropriate cleaning tool to remove any debris, old gasket material, or corrosion. Inspect the flange faces for any damage, such as nicks or scratches, that could compromise the seal. If necessary, use a flange facing tool to restore a smooth sealing surface.
Check the alignment of the pipe flanges to ensure they're parallel and properly spaced. Misalignment can lead to uneven pressure on the valve and potential leaks. If needed, adjust the pipe supports or use alignment tools to correct any issues. For wafer-style valves, verify that the pipe flanges are spread to the correct distance to accommodate the new valve. This is also a good time to inspect the surrounding piping for any signs of wear or damage that might affect the new valve's performance. By thoroughly preparing the pipeline, you create optimal conditions for a secure and leak-free installation of the new butterfly valve.
Installing the New Butterfly Valve
With the pipeline properly prepared, you can now proceed with installing the new butterfly valve. Begin by carefully unpacking the new valve and inspecting it for any damage that may have occurred during shipping. Verify that the valve's specifications match your requirements and that it opens and closes smoothly. If the valve comes with separate gaskets, ensure they're properly positioned on both sides of the valve body.
For flanged valves, align the valve between the pipe flanges, making sure it's centered and level. Insert the flange bolts and hand-tighten them initially. It's important to tighten the bolts in a crisscross pattern to ensure even pressure distribution. Use a torque wrench to achieve the specified bolt torque, typically tightening in stages to prevent distortion. For wafer-style valves, carefully slide the valve between the pipe flanges, ensuring it's properly seated and aligned. Some valves may have positioning lugs to aid in alignment.
Once the valve is securely in place, reconnect any actuators or control devices that were removed earlier. Double-check all connections, including electrical and pneumatic lines, to ensure they're properly secured. Before pressurizing the system, perform a final visual inspection to verify proper installation and alignment. By following these steps meticulously, you'll ensure a proper and secure installation of your new butterfly valve.
Post-Installation Procedures and Testing
System Pressurization and Leak Testing
After installing the new butterfly valve, it's crucial to carefully pressurize the system and conduct thorough leak testing. Begin by slowly introducing pressure to the system, preferably using an inert gas like nitrogen if possible. Gradually increase the pressure while monitoring all connections and the valve itself for any signs of leaks. Use a soap solution or specialized leak detection fluid to check for bubbles or foam that would indicate a leak.
Pay particular attention to the valve's body-to-bonnet joint, stem packing, and flange connections. These are common areas where leaks might occur. If you detect any leaks, depressurize the system immediately and address the issue before proceeding. This might involve tightening bolts, adjusting packing, or in some cases, replacing gaskets. Once you've confirmed that there are no leaks at low pressure, gradually increase the pressure to the system's normal operating level and repeat the leak check. Remember to follow all safety protocols during this process, as working with pressurized systems can be dangerous.
Valve Operation and Control System Integration
With the leak testing complete, the next step is to verify the proper operation of the newly installed butterfly valve and integrate it into the control system. Start by manually operating the valve through its full range of motion, from fully closed to fully open. Check for smooth operation and any signs of binding or resistance. If the valve is equipped with an actuator, test its functionality, ensuring it responds correctly to control signals.
For automated systems, calibrate the valve position sensors and verify that the feedback signals accurately reflect the valve's position. Test the valve under various operating conditions to ensure it performs as expected across its entire operating range. This may include checking response times, verifying fail-safe positions, and testing any interlocks or safety functions associated with the valve. If the valve is part of a larger control loop, conduct loop tuning to optimize system performance. Finally, update any relevant documentation, including P&IDs, maintenance records, and control system parameters, to reflect the new valve installation.

Maintenance Schedule and Long-term Care
To ensure the longevity and reliable performance of your newly installed butterfly valve, it's essential to establish a comprehensive maintenance schedule. Begin by consulting the manufacturer's recommendations for maintenance intervals and procedures. Typically, this will include regular visual inspections to check for signs of wear, corrosion, or leakage. Schedule periodic operational tests to verify smooth valve movement and proper sealing.
Develop a lubrication plan for moving parts, such as the valve stem and bearings, following the manufacturer's guidelines for lubricant type and frequency. If the valve is equipped with packing, plan for periodic adjustment or replacement to maintain a proper seal. For valves in critical service or harsh environments, consider implementing condition monitoring techniques, such as vibration analysis or thermal imaging, to detect potential issues early.
Create a detailed log of all maintenance activities, including dates, procedures performed, and any parts replaced. This documentation will be valuable for tracking the valve's performance over time and planning future maintenance. Additionally, ensure that spare parts for common wear items are kept in stock to minimize downtime during future maintenance or repairs. By implementing a thorough maintenance program, you'll maximize the lifespan of your butterfly valve and maintain optimal system performance.
Conclusion
Replacing a butterfly valve is a critical maintenance task that requires careful planning, precise execution, and thorough follow-up procedures. By following this comprehensive guide, you can ensure a successful valve replacement that enhances system reliability and efficiency. Remember to prioritize safety throughout the process, from system shutdown to final testing. Proper preparation, including gathering the right tools and selecting the correct replacement valve, sets the foundation for a smooth installation. After installation, meticulous leak testing and operational verification are crucial to confirm the valve's integrity and performance. Finally, implementing a robust maintenance schedule will help maintain the valve's longevity and reliability, ultimately contributing to the overall efficiency of your industrial system.
FAQs
1. How often should butterfly valves be replaced?
The replacement frequency depends on factors like usage, environment, and maintenance. Generally, industrial butterfly valves can last 10-20 years with proper care.
2. Can I replace a butterfly valve without shutting down the entire system?
It's not recommended. For safety and proper installation, the system should be fully shut down and depressurized.
3. What are common signs that a butterfly valve needs replacement?
Signs include leakage, difficulty in operation, visible wear or corrosion, and frequent need for adjustment.
4. Is it necessary to replace gaskets when installing a new butterfly valve?
Yes, it's best practice to use new gaskets to ensure a proper seal and prevent leaks.
5. Can I upgrade to a different type of valve during replacement?
It's possible, but ensure the new valve is compatible with your system's requirements and piping configuration.
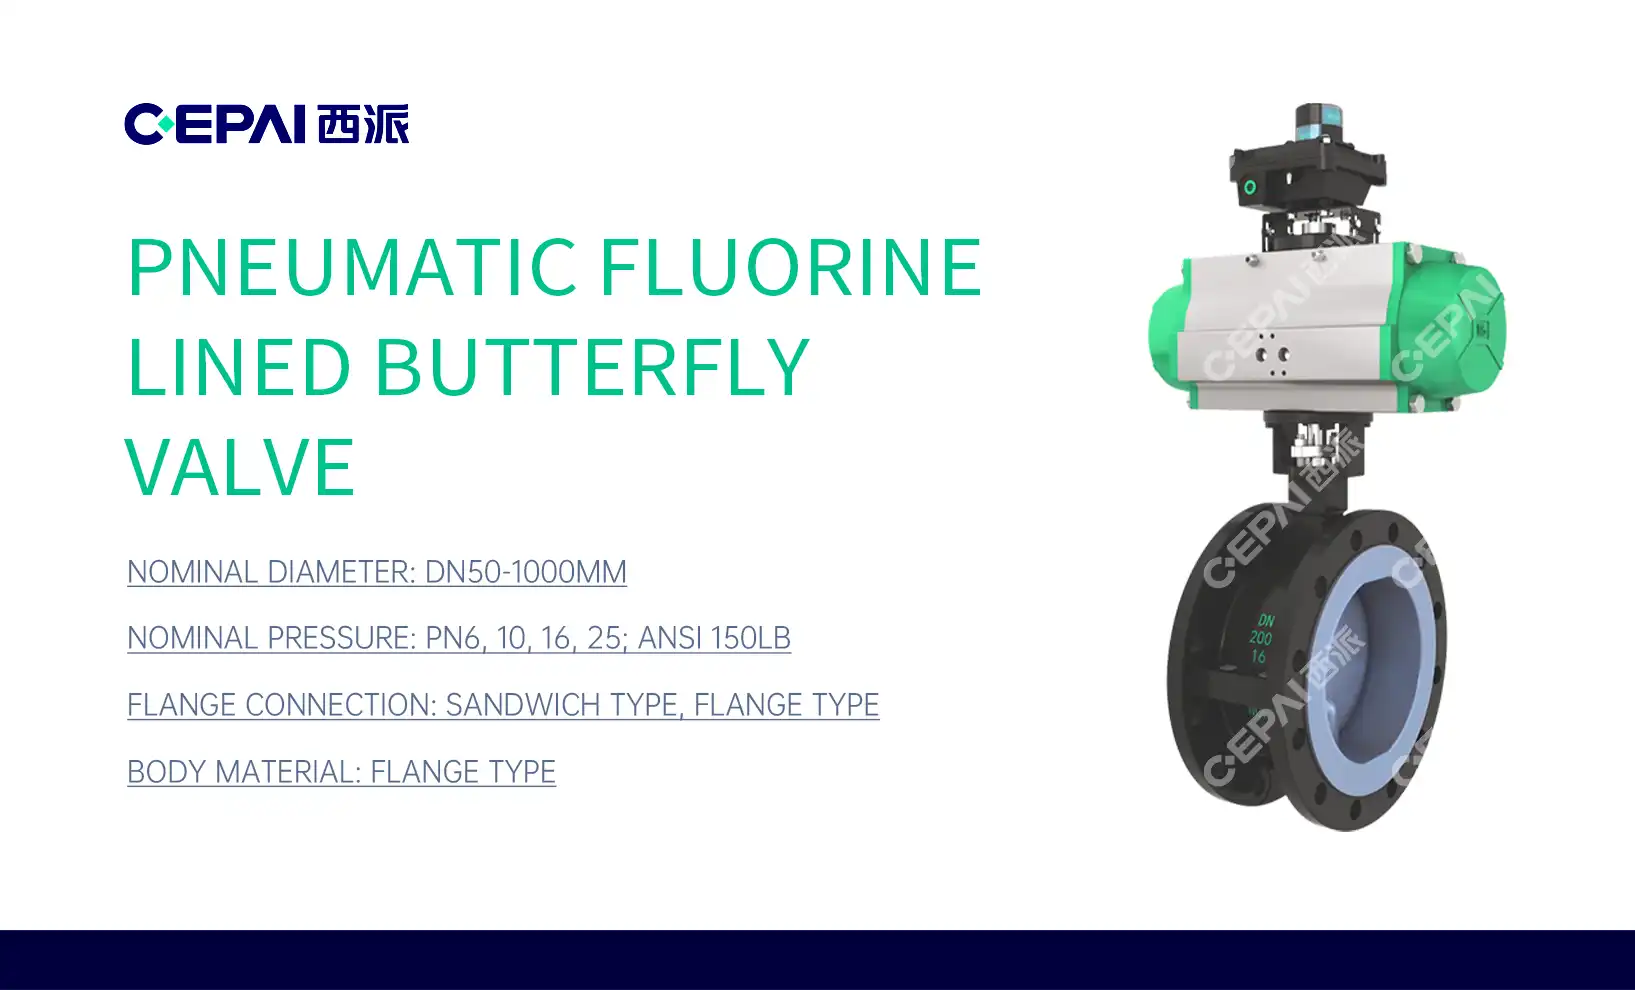
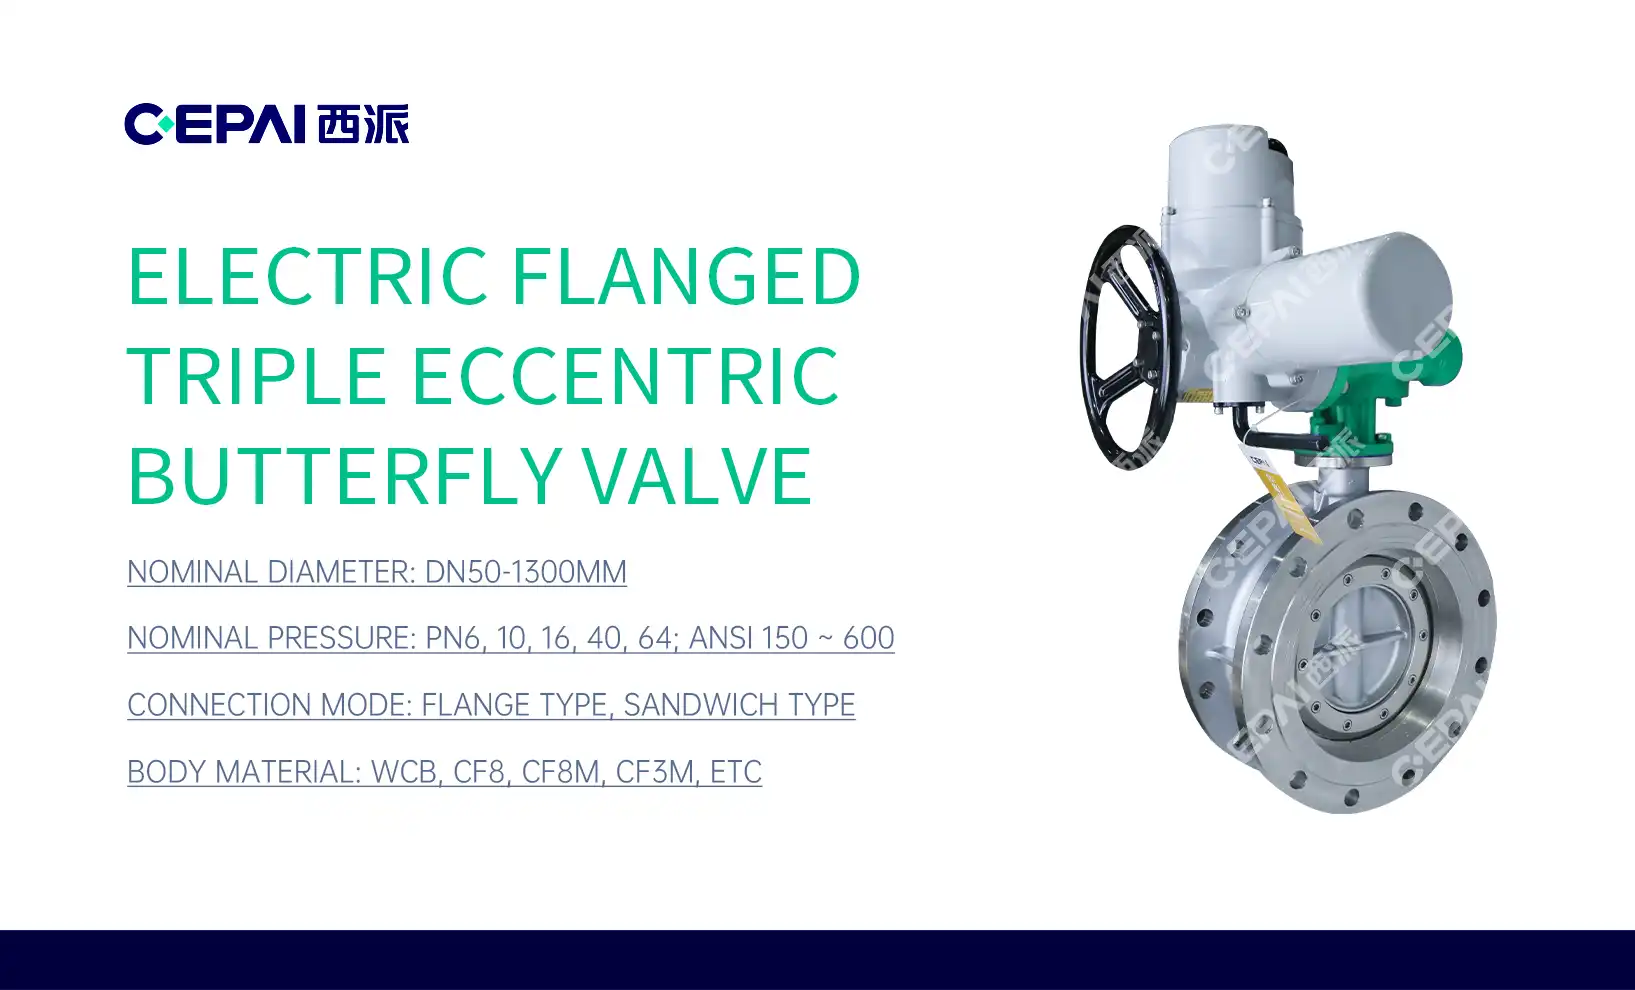
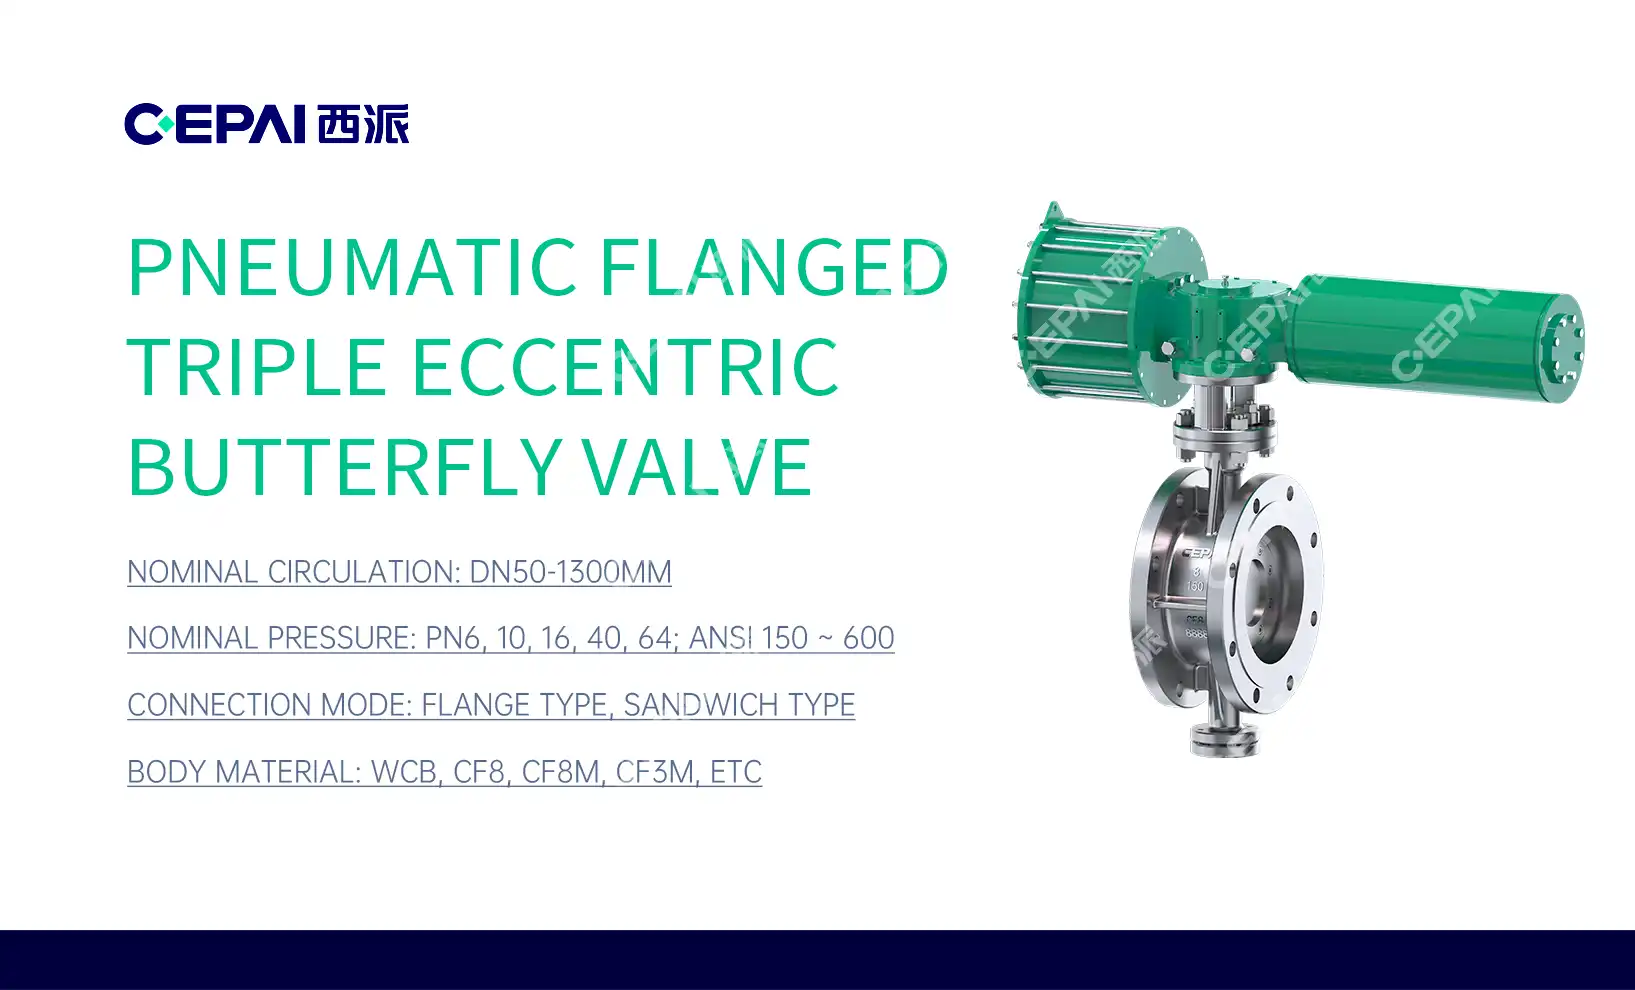
Expert Butterfly Valve Solutions | CEPAI
At CEPAI Group, we specialize in providing top-quality butterfly valves. Our valves are designed and manufactured to meet the highest industry standards, ensuring reliability and longevity in even the most demanding applications. As a butterfly valve leading supplier and manufacturer, we offer a comprehensive range of butterfly valves suitable for various industrial needs. Our commitment to quality is reflected in our rigorous testing procedures and adherence to international standards. For professional assistance with butterfly valve selection, replacement, or maintenance, contact our team of experts at cepai@cepai.com.

References
Smith, J. (2022). "Advanced Butterfly Valve Maintenance Techniques." Industrial Valve Journal, 45(3), 78-92.
Johnson, R. & Williams, T. (2021). "Best Practices in Industrial Valve Replacement." Process Engineering Handbook, 3rd Edition. New York: Industrial Press.
Lee, S. et al. (2023). "Comparative Study of Butterfly Valve Materials for Corrosive Environments." Journal of Materials Engineering and Performance, 32(1), 112-125.
Brown, A. (2020). "Safety Protocols for High-Pressure Valve Replacement." Safety Engineering Review, 18(4), 201-215.
Garcia, M. & Chen, L. (2022). "Optimization of Butterfly Valve Design for Improved Flow Characteristics." Fluid Dynamics Research, 54(2), 025502.
Thompson, E. (2021). "Long-term Performance Analysis of Industrial Butterfly Valves." Reliability Engineering & System Safety, 207, 107360.
_1746598538016.webp)